How to Create Custom Skins in Minecraft PE
Latest Update on
Latest Update on
Minecraft Pocket Edition (Minecraft PE) is a popular game that allows players to build and explore virtual worlds. One of the most engaging aspects of the game is the ability to personalize your experience, and creating custom skins is a fantastic way to express your creativity and stand out from the crowd. This comprehensive guide will walk you through how to create custom skins in Minecraft PE in popular and easy ways.
Here’s a detailed guide on how to create custom skins in Minecraft PE directly:
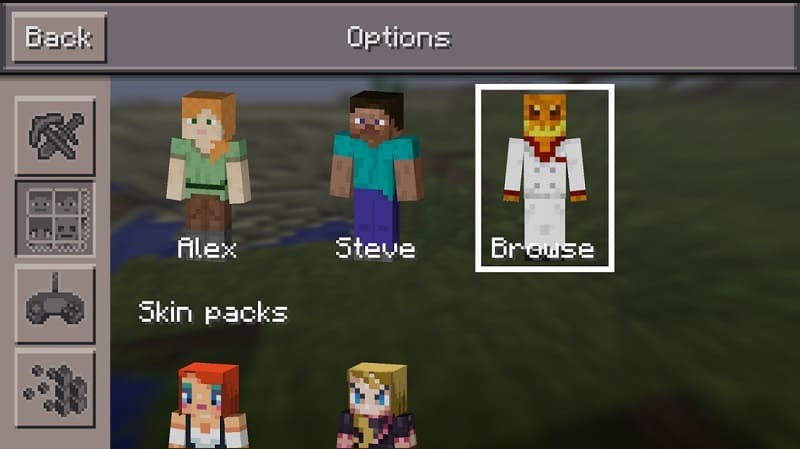
Step 1: Open the Minecraft PE App
Step 2: Access the Skin Settings
Step 3: Choose or Create a New Skin
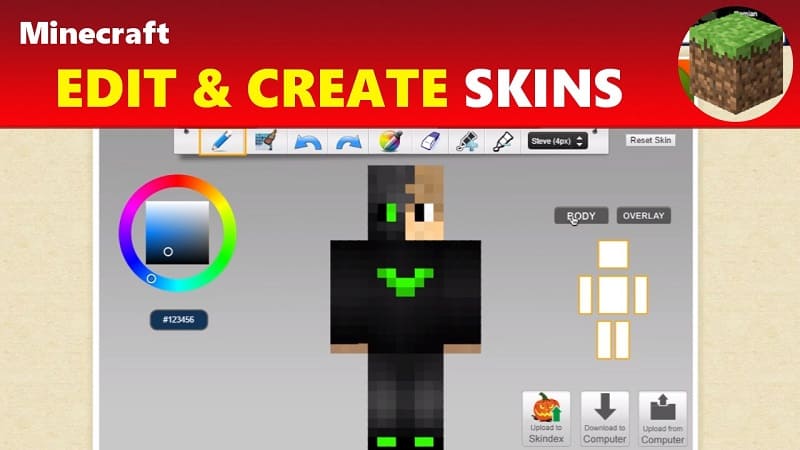
Step 4: Design Your Custom Skin
Step 5: Save and Apply Your Skin
For more options and flexibility in creating custom skins, you can use support apps. Here’s a detailed guide for both Android and iOS devices.
Step 1: Download and Install a Support App
Step 2: Open the App and Start Creating
Step 3: Use the Editing Tools
Step 4: Save and Export the Skin
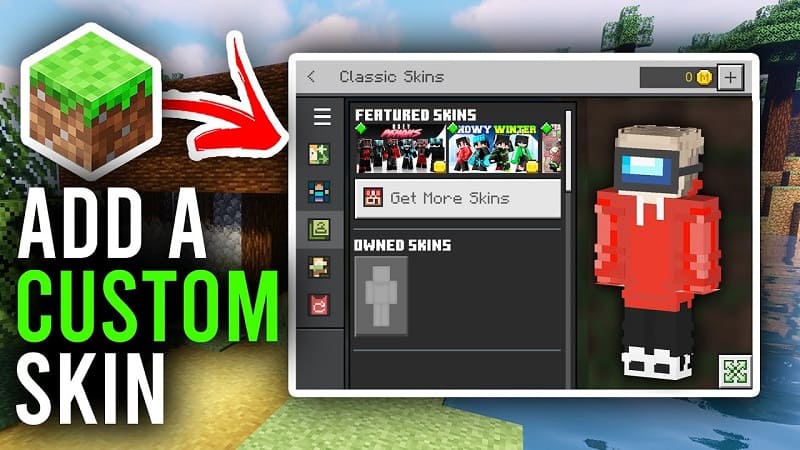
Step 5: Apply the Skin in Minecraft PE
Step 1: Download and Install a Support App
Step 2: Open the App and Start Creating
Step 3: Use the Editing Tools
Step 4: Save and Export the Skin
Step 5: Apply the Skin in Minecraft PE
>> See more: Transfer Line Chat History to A New Phone
Keep it Simple
When designing your skin, it’s tempting to add as many details and colors as possible. However, keep in mind that the skin is only 64×32 pixels, and too many small details can make it look cluttered and messy. Stick to one or two primary colors and use shading techniques to add depth and dimension.
Use References
If you’re struggling to come up with a design, don’t be afraid to use references. Look up images or characters from your favorite movies, TV shows, or games for inspiration. You can also browse existing skins in Minecraft PE’s skin library for ideas.
Experiment with Shading Techniques
Shading is crucial in creating a realistic and visually appealing skin. Experiment with different techniques, such as cross-hatching or blending, to see what works best for your design. Though it could require some practice, the outcome will be worthwhile.
Use Layers
Don’t be afraid to utilize all three layers of the skin template. You can add different elements like hair, accessories, or clothing on each layer to create a more detailed and polished look.
Test Your Skin
Before finalizing your skin, make sure to test it out in Minecraft PE. Sometimes, what looks good on the template may not look as good when applied to the character. Make any necessary adjustments and test again until you’re satisfied with the result.
Creating custom skins in Minecraft PE is a great way to personalize your gaming experience. With detailed guides and support apps, this task becomes easier and more enjoyable. Be creative and experiment to make unique skins that show off your personality in the Minecraft world. Enjoy your creative and limitless adventures with custom skins on your Minecraft PE device!